
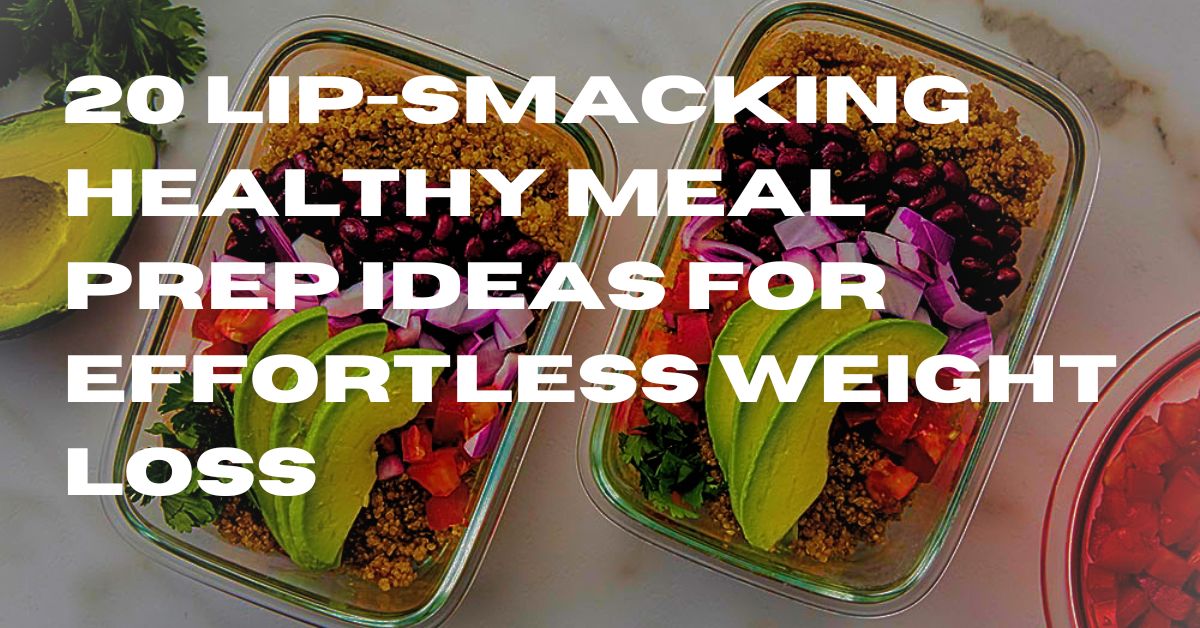
Struggling to maintain a well-balanced diet as you strive to shed those extra pounds? Allow me, an accomplished weight loss trainer, to empathize with the trials and tribulations associated with attaining your weight loss aspirations.
Rest assured, I am here to lend a helping hand by presenting you with a compilation of 20 nourishing and delectable meal preparation concepts tailored explicitly for weight loss.
Within this comprehensive exposé, anticipate an assortment of culinary delights that not only appease your taste buds but can also be conveniently prepped in advance, effectively saving you precious time while fortifying your commitment to your weight loss expedition.
Irrespective of whether you find yourself encompassed by the chaotic world of professionals, immersed in the demanding life of a student, fulfilling the parental duties that never cease, or simply yearning to embrace a more health-conscious way of living, these ingenious meal preparation suggestions will prove to be an invaluable resource that propels you toward the realization of your goals.
Prepare to embark on a delightful odyssey, brimming with an extensive array of flavors and ingenious combinations guaranteed to keep your motivation levels soaring, your satiety levels at an all-time high, and your journey towards triumph unimpeded.
What Is Meal Prepping?
Meal prepping is the practice of planning and preparing meals in advance, typically for several days or even an entire week.
This popular approach to nutrition and time management has gained traction for its ability to promote healthier eating habits, save time, and support weight loss goals.
Numerous studies have explored the benefits of meal prepping, shedding light on its positive impact on dietary choices and weight management.
A study published in the International Journal of Behavioural Nutrition and Physical Activity examined the effects of meal prepping on diet quality and body weight among adults.
The research involved 40 participants who were randomly assigned to either a meal prepping intervention group or a control group. Over a 12-week period, the intervention group received guidance on meal planning, prepping, and portion control.
The results of the study revealed compelling evidence of the effectiveness of meal prepping. Participants in the intervention group demonstrated significant improvements in diet quality, consuming more fruits, vegetables, and whole grains compared to the control group.
Moreover, the meal prepping group experienced greater weight loss and reduced body mass index (BMI) compared to those in the control group.
These findings highlight the importance of meal prepping as a strategy for achieving weight loss goals and improving dietary habits.
By taking the time to plan and prepare meals in advance, individuals are more likely to make nutritious choices and avoid impulsive, unhealthy food options. Meal prepping also allows for portion control, as pre-portioned meals can help individuals better manage their calorie intake and prevent overeating.
In addition to the tangible health benefits, meal prepping offers a range of practical advantages. It saves time throughout the week by minimizing the need for daily meal preparation.
With meals already cooked and portioned, individuals can simply reheat and enjoy a nutritious meal in a matter of minutes. This time-saving aspect is especially beneficial for individuals with busy schedules, enabling them to prioritize their health and well-being without sacrificing convenience.
The Importance of Meal Prep for Weight Loss
Meal prep is a powerful strategy that plays a crucial role in achieving and maintaining weight loss goals. It offers numerous benefits that can significantly impact your success in reaching a healthier weight.
In this article, we will explore the importance of meal prep and how it can be informative and helpful for weight loss.
1. Portion Control:
Meal prepping allows you to take control of your portion sizes with precision. By carefully measuring and dividing your meals in advance, you can ensure that you’re consuming the right number of calories and macronutrients.
This prevents overeating and promotes weight loss by creating a calorie deficit. When you’re in control of your portions, it becomes easier to manage your calorie intake and stay on track with your weight loss goals.
Research published in the Science Direct showed that individuals who engaged in meal prepping were more likely to consume appropriate portion sizes compared to those who did not.
2. Nutritional Balance:
When you prepare your meals ahead of time, you can create well-balanced and nutrient-dense options. You can include lean proteins, such as chicken, fish, or tofu, which provide essential amino acids for muscle repair and growth.
Whole grains like quinoa, brown rice, or whole wheat pasta offer complex carbohydrates that provide sustained energy.
Plenty of fruits and vegetables supply vitamins, minerals, and fibre. Healthy fats from sources like avocado, nuts, and olive oil support satiety and promote heart health.
By incorporating a variety of nutritious foods in appropriate portions, you ensure that your body receives essential nutrients while reducing unnecessary calories and promoting weight loss.
By focusing on nutrient-dense foods, you can also improve your overall health and well-being.
A study published in the Journal of Sage found that individuals who regularly practiced meal prep had higher dietary quality and adherence to nutritional guidelines.
3. Reduced Temptations:
One of the biggest challenges in weight loss is resisting unhealthy food choices. However, with meal prep, you can avoid impulsive decisions and temptations.
Having pre-prepared meals waiting for you eliminates the need to rely on unhealthy takeout or snacks. This keeps you on track with your weight loss goals, making it easier to maintain consistency and progress.
By having healthy options readily available, you can resist the urge to make unhealthy food choices. It also allows you to customize your meals to suit your preferences and dietary needs, ensuring that you enjoy the food you eat while still achieving your weight loss goals.
Research published in the International Journal of Behavioural Nutrition and Physical Activity demonstrated that meal prepping can decrease the consumption of fast food and unhealthy snacks.
4. Time Efficiency:
In our fast-paced lives, finding time to cook healthy meals can be challenging. But dedicating a few hours each week to meal prep can save you valuable time in the long run.
By having pre-made meals, you can minimize the time spent on cooking and cleaning up during the week. This allows you to prioritize other aspects of your life while still ensuring proper nutrition for weight loss.
With busy schedules, it’s common to resort to convenient but unhealthy options. However, with meal prep, you can have nutritious meals ready to grab and go, saving you time and ensuring you stay on track with your weight loss journey.
This time efficiency is particularly beneficial for individuals with busy schedules, making it easier to adhere to a healthy eating plan.
5. Accountability and Consistency:
Meal prep promotes accountability and consistency in your eating habits. When you have a plan in place and prepped meals ready to go, you’re less likely to deviate from your weight loss goals.
It eliminates the need to make impromptu decisions when hunger strikes, reducing the risk of making unhealthy choices.
By sticking to your meal plan, you can establish healthy eating habits that lead to long-term weight loss success.
Meal prep helps create structure and discipline in your eating routine, making it easier to resist temptations and make conscious choices that support your weight loss goals.
According to research published in Science Direct, individuals who engaged in meal prepping reported higher levels of dietary adherence and consistency in their eating habits.
Having pre-planned meals reduced the reliance on spontaneous decision-making, making it easier to stick to healthy choices and avoid deviations from weight loss goals.
6. Education and Awareness:
Meal prep provides an opportunity to educate yourself about proper nutrition and portion sizes. As you plan your meals, you learn about the nutritional content of different foods, their calorie values, and how they contribute to your weight loss goals.
This knowledge empowers you to make informed choices and develop a better understanding of how food impacts your body. By educating yourself, you can make better choices and improve your overall health.
Additionally, meal prep allows you to experiment with new ingredients, recipes, and cooking techniques, expanding your culinary skills and repertoire.
7. Long-Term Sustainability:
Meal prep is not just a short-term solution; it sets the foundation for a sustainable and healthy lifestyle. By incorporating meal prep into your routine, you develop practical skills and habits that can be maintained even after reaching your weight loss goals.
It helps you establish a healthy relationship with food and promotes long-term weight management. By making meal prep a habit, you can achieve and maintain your weight loss goals for years to come.
It becomes a way of life that supports your overall well-being, ensuring that you continue to prioritize your health and make conscious choices regarding your nutrition.
Essential tools and containers for meal prepping
When it comes to meal prepping, having the right tools and containers can make the process more efficient and effective. Here are some essential tools and containers that can greatly facilitate your meal prep endeavours:
Meal Prep Containers:
Invest in a set of high-quality meal prep containers that are durable, leak-proof, and microwave-safe. Look for containers with divided compartments to keep different food items separate and prevent them from mixing. Opt for BPA-free containers that are easy to stack and store in your refrigerator or freezer.
Explore a Variety of Meal Prep Containers for Efficient Planning.
Food Scale:
A food scale is a handy tool for accurately measuring portion sizes and ensuring that you’re sticking to your desired calorie and macronutrient targets. It allows you to portion out your meals precisely, promoting portion control and supporting your weight loss goals.
Elevate Your Culinary Experience with a Precision Food Scale.
Measuring Cups and Spoons:
Measuring cups and spoons are essential for portioning out ingredients accurately, especially when following recipes or tracking specific quantities. They help you maintain consistency in your meal prep and ensure that you’re adding the right amount of ingredients to achieve the desired nutritional balance.
Ensure Accuracy in Your Recipes with High-Quality Measuring Cups and Spoons.
Sharp Knives:
Investing in a good set of sharp knives is crucial for efficient meal prep. Sharp knives make chopping, slicing, and dicing ingredients easier and safer, allowing you to quickly and precisely prepare your meals. A variety of knife sizes and types, such as a chef’s knife, paring knife, and serrated knife, can cover a wide range of cutting tasks.
Invest in Sharp Knives for Effortless Food Preparation.
Cutting Boards:
Choose durable and easy-to-clean cutting boards that provide a spacious surface for food preparation. Consider having multiple cutting boards to separate different types of ingredients, such as raw meats, fruits, and vegetables, to prevent cross-contamination.
Choose Durable Cutting Boards to Safely Chop and Dice Ingredients.
Blender or Food Processor:
A blender or food processor can be a versatile tool for meal prepping. It allows you to quickly puree sauces, make smoothies, or prepare homemade dressings and dips. Look for a high-powered blender or food processor that can handle a variety of ingredients and textures.
Enhance Your Kitchen Efficiency with a Reliable Blender or Food Processor.
Meal Prep Bag or Cooler:
If you need to transport your prepped meals to work, school, or other places, a meal prep bag or cooler can keep your food fresh and safe. Look for an insulated bag with compartments to store your containers, along with additional pockets for carrying utensils, snacks, and beverages.
Optimize On-the-Go Nutrition with a Stylish Meal Prep Bag or Cooler.
Labels and Marker:
Labelling your meal prep containers with the date and contents can help you stay organized and ensure that you consume meals in the right order. Use waterproof labels or a marker that won’t smudge to clearly mark each container.
Stay Organized with Labels and Marker Sets for Easy Meal Identification.
20 Amazing Meal Prep Ideas
Here are 20 amaing meal prep ideas to kick start your day oor to make your lunch oor dinner tastefully.
Quinoa and roasted vegetable salad
Ingredients:
- 1 cup quinoa
- 2 cups water or vegetable broth
- 2 cups mixed vegetables (such as bell peppers, zucchini, cherry tomatoes, and red onions)
- 2 tablespoons olive oil
- 1 teaspoon dried herbs (such as thyme, rosemary, or oregano)
- Salt and pepper to taste
- 1/4 cup crumbled feta cheese (optional)
- Fresh parsley for garnish
Instructions:
- Preheat the oven to 425°F (220°C) and line a baking sheet with parchment paper.
- Rinse the quinoa under cold water in a fine-mesh sieve to remove any bitterness. In a medium-sized saucepan, bring the water or vegetable broth to a boil. Add the quinoa, reduce the heat to low, cover, and simmer for about 15 minutes or until the quinoa is cooked and the liquid is absorbed. Remove from heat and let it sit, covered, for 5 minutes. Fluff the quinoa with a fork.
- Meanwhile, chop the mixed vegetables into bite-sized pieces. Place them on the prepared baking sheet and drizzle with olive oil. Sprinkle with dried herbs, salt, and pepper. Toss to coat the vegetables evenly.
- Roast the vegetables in the preheated oven for about 20-25 minutes, or until they are tender and slightly caramelized, stirring once halfway through. Remove from the oven and let them cool.
- In a large bowl, combine the cooked quinoa and roasted vegetables. Toss gently to mix well. Taste and adjust the seasoning if needed.
- Divide the quinoa and roasted vegetable salad into individual meal prep containers. If desired, sprinkle each portion with crumbled feta cheese for added flavour.
- Garnish with fresh parsley for a pop of freshness and colour.
- Refrigerate the meal prep containers and consume within 3-4 days.
This quinoa and roasted vegetable salad is a nutritious and flavourful option for your meal prep. Packed with protein from quinoa and a variety of vitamins and minerals from the roasted vegetables, it provides a satisfying and balanced meal.
Enjoy it as a refreshing lunch or dinner throughout the week, knowing that you have a healthy and delicious meal ready to fuel your weight loss journey.
Grilled chicken with steamed broccoli and brown rice
Ingredients:
- 4 boneless, skinless chicken breasts
- 2 cups broccoli florets
- 2 cups cooked brown rice
- 2 tablespoons olive oil
- 1 teaspoon garlic powder
- 1 teaspoon paprika
- Salt and pepper to taste
Instructions:
- Preheat your grill to medium-high heat.
- Season the chicken breasts with salt, pepper, garlic powder, and paprika on both sides.
- Drizzle olive oil over the seasoned chicken breasts, ensuring they are evenly coated.
- Place the chicken breasts on the preheated grill and cook for about 6-8 minutes per side, or until the internal temperature reaches 165°F (74°C). Cooking times may vary depending on the thickness of the chicken breasts.
- While the chicken is grilling, steam the broccoli florets until they are tender-crisp. You can use a steamer basket or cook them in a microwave-safe dish with a little water for about 4-5 minutes.
- Once the chicken is fully cooked, remove it from the grill and let it rest for a few minutes. Then, slice it into strips or cubes for easier portioning.
- Divide the cooked brown rice, grilled chicken, and steamed broccoli evenly into meal prep containers.
- Allow the components to cool before sealing the containers and placing them in the refrigerator.
- When you’re ready to enjoy a meal, simply heat the desired portion in the microwave until heated through.
Meal Prep Tips:
- To keep the flavours fresh, you can store the cooked brown rice separately and add it to the meal prep containers just before reheating.
- Feel free to add additional seasonings or spices to the chicken according to your taste preferences.
- Customize your meal prep by adding a sauce or dressing of your choice, such as a light teriyaki sauce or a squeeze of fresh lemon juice.
This grilled chicken with steamed broccoli and brown rice meal prep recipe provides a balanced combination of lean protein, fibre-rich vegetables, and complex carbohydrates.
It’s a nutritious and satisfying option that can be enjoyed throughout the week, helping you stay on track with your weight loss goals while enjoying delicious and convenient meals.
Lentil Curry with Quinoa Meal Prep Recipe
Ingredients:
- 1 cup dry lentils
- 1 cup quinoa
- 1 onion, diced
- 2 cloves of garlic, minced
- 1 tablespoon curry powder
- 1 teaspoon ground cumin
- 1 teaspoon ground coriander
- 1/2 teaspoon turmeric
- 1/4 teaspoon cayenne pepper (optional, for spice)
- 1 can (14 ounces) diced tomatoes
- 1 can (14 ounces) coconut milk
- 2 cups vegetable broth
- 2 cups spinach leaves
- Salt and pepper to taste
- Fresh cilantro, for garnish (optional)
Instructions:
- Rinse the lentils and quinoa separately under cold water.
- In a large pot, heat some olive oil over medium heat. Add the diced onion and minced garlic and sauté until fragrant and translucent.
- Add the curry powder, cumin, coriander, turmeric, and cayenne pepper (if using) to the pot. Stir well to coat the onions and garlic with the spices.
- Add the lentils, quinoa, diced tomatoes (with their juices), coconut milk, and vegetable broth to the pot. Stir everything together.
- Bring the mixture to a boil, then reduce the heat to low. Cover the pot and let it simmer for about 20-25 minutes, or until the lentils and quinoa are tender and cooked through.
- Once the lentils and quinoa are cooked, add the spinach leaves to the pot. Stir well and let it cook for an additional 2-3 minutes until the spinach wilts.
- Season the lentil curry with salt and pepper to taste. Adjust the seasoning and spice level according to your preference.
- Remove the pot from the heat and let the curry cool down.
- Divide the lentil curry into individual meal prep containers. Make sure to leave some space at the top for expansion when freezing.
- If you’re planning to enjoy the meal prep within a few days, store the containers in the refrigerator. Otherwise, you can freeze them for later use.
- When ready to eat, simply reheat the lentil curry in the microwave or on the stovetop. Garnish with fresh cilantro, if desired, and enjoy!
This lentil curry with quinoa meal prep recipe is packed with plant-based protein, fibre, and a variety of spices that add wonderful flavours.
It’s a nutritious and satisfying option that can be enjoyed as a complete meal on its own or paired with a side of roasted vegetables or a salad.
Feel free to customize the recipe by adding your favourite vegetables or adjusting the spice level to suit your taste buds. Happy meal prepping!
Baked salmon with roasted asparagus
Ingrediets
- 2 salmon fillets
- 1 bunch of asparagus
- 2 tablespoons olive oil
- 2 cloves of garlic, minced
- 1 lemon, sliced
- Salt and pepper to taste
- Fresh dill, for garnish (optional)
Instructions:
- Preheat your oven to 400°F (200°C).
- Line a baking sheet with parchment paper or foil for easy cleanup.
- Place the salmon fillets on the baking sheet and drizzle with 1 tablespoon of olive oil. Season with salt and pepper to taste.
- Arrange the lemon slices on top of the salmon fillets. This will infuse them with a bright, citrusy flavour.
- In a bowl, toss the asparagus spears with the minced garlic, 1 tablespoon of olive oil, salt, and pepper.
- Place the seasoned asparagus around the salmon fillets on the baking sheet.
- Bake in the preheated oven for about 12-15 minutes, or until the salmon is cooked through and flakes easily with a fork. The asparagus should be tender and slightly crispy.
- Once cooked, remove the baking sheet from the oven and let the salmon and asparagus cool.
- Divide the baked salmon and roasted asparagus into individual meal prep containers.
- If you plan to enjoy the meal prep within a few days, store the containers in the refrigerator. Otherwise, you can freeze them for later use.
- When ready to eat, simply reheat the meal prep in the microwave or enjoy it cold.
- Garnish with fresh dill, if desired, for an extra burst of flavour.
This baked salmon with roasted asparagus meal prep recipe is not only delicious but also packed with omega-3 fatty acids, protein, and essential nutrients.
It’s a healthy and convenient option that can be enjoyed for lunch or dinner. Feel free to add your favourite seasonings or spices to customize the flavours.
Pair it with a side of quinoa, brown rice, or a leafy green salad for a complete and balanced meal. Enjoy the benefits of meal prepping and savour this nutritious dish!
Turkey meatballs with zucchini noodles
Ingrediets
- 1 lb (450g) ground turkey
- 1/2 cup breadcrumbs (use gluten-free breadcrumbs if desired)
- 1/4 cup grated Parmesan cheese
- 1/4 cup chopped fresh parsley
- 1 egg, lightly beaten
- 2 cloves garlic, minced
- 1 teaspoon dried oregano
- 1/2 teaspoon salt
- 1/4 teaspoon black pepper
- 2 tablespoons olive oil
- 4-6 zucchini, spiralized into noodles
- Marinara sauce, for serving
- Fresh basil leaves, for garnish (optional)
Instructions:
- Preheat your oven to 400°F (200°C).
- In a large bowl, combine the ground turkey, breadcrumbs, Parmesan cheese, parsley, egg, minced garlic, dried oregano, salt, and black pepper. Mix well until all the ingredients are evenly incorporated.
- Shape the turkey mixture into small meatballs, about 1-2 inches in diameter.
- Heat the olive oil in a large skillet over medium heat. Add the turkey meatballs and cook for about 5 minutes, or until browned on all sides.
- Transfer the partially cooked meatballs to a baking dish and place them in the preheated oven. Bake for approximately 15-20 minutes, or until the meatballs are cooked through and no longer pink in the centre.
- While the meatballs are baking, prepare the zucchini noodles using a spiralizer or julienne peeler.
- In the same skillet used to cook the meatballs, add the spiralized zucchini noodles. Cook them over medium heat for 2-3 minutes until they are slightly softened but still retain some crunch.
- Divide the zucchini noodles into individual meal prep containers.
- Once the meatballs are cooked, let them cool slightly before adding them to the meal prep containers. Place the desired number of meatballs on top of the zucchini noodles.
- Pour marinara sauce over the meatballs and noodles, dividing it evenly among the containers.
- If you plan to enjoy the meal prep within a few days, store the containers in the refrigerator. Otherwise, you can freeze them for later use.
- When ready to eat, simply reheat the meal prep in the microwave or heat it in a skillet until warmed through.
- Garnish with fresh basil leaves, if desired, for a pop of freshness and flavours.
This turkey meatballs with zucchini noodles meal prep recipe are a healthy and flavourful option that’s perfect for those looking to incorporate more lean protein and vegetables into their diet.
The turkey meatballs are packed with protein, while the zucchini noodles provide a low-carb alternative to traditional pasta.
The meal prep containers make it convenient to enjoy this delicious dish throughout the week, whether for lunch or dinner.
Customize the flavours by using your favourite marinara sauce or adding additional spices. It’s a satisfying and nutritious meal that will keep you on track with your weight loss goals. Enjoy!
Greek salad with grilled chicken
Ingrediets
- 2 boneless, skinless chicken breasts
- 2 teaspoons dried oregano
- 1 teaspoon garlic powder
- 1 teaspoon onion powder
- 1/2 teaspoon salt
- 1/4 teaspoon black pepper
- 2 tablespoons olive oil
- 4 cups mixed salad greens
- 1 cucumber, sliced
- 1 cup cherry tomatoes, halved
- 1/2 cup sliced red onion
- 1/2 cup Kalamata olives
- 1/2 cup crumbled feta cheese
- Juice of 1 lemon
- 2 tablespoons extra virgin olive oil
- Salt and pepper, to taste
Instructions:
- Preheat your grill or grill pan to medium-high heat.
- In a small bowl, mix together the dried oregano, garlic powder, onion powder, salt, black pepper, and olive oil to create a marinade for the chicken.
- Rub the marinade over both sides of the chicken breasts, ensuring they are evenly coated. Let the chicken marinate for at least 15 minutes to allow the flavours to penetrate.
- Place the marinated chicken breasts on the preheated grill and cook for 6-8 minutes per side, or until the internal temperature reaches 165°F (74°C). Remove the chicken from the grill and let it rest for a few minutes before slicing.
- While the chicken is resting, prepare the Greek salad. In a large bowl, combine the mixed salad greens, cucumber slices, cherry tomatoes, sliced red onion, Kalamata olives, and crumbled feta cheese.
- In a separate small bowl, whisk together the lemon juice, extra virgin olive oil, salt, and pepper to create a simple dressing for the salad.
- Drizzle the dressing over the salad ingredients and toss gently to coat everything evenly.
- Divide the Greek salad into individual meal prep containers.
- Slice the grilled chicken into strips or bite-sized pieces and place them on top of the Greek salad in each container.
- Seal the containers and refrigerate them until ready to eat.
- When you’re ready to enjoy your meal prep, simply give the salad a quick toss to redistribute the dressing and flavours.
This Greek salad with grilled chicken meal prep recipe is a fresh and satisfying option for a healthy lunch or dinner.
The combination of crisp mixed greens, juicy tomatoes, crunchy cucumber, tangy Kalamata olives, and creamy feta cheese provides a burst of flavours and textures.
The grilled chicken adds lean protein, making it a well-rounded and nutritious meal. The simple lemon dressing enhances the flavours of the salad without overpowering them.
By prepping this salad ahead of time, you can conveniently enjoy a taste of Greece throughout the week, helping you stay on track with your weight loss goals.
Stuffed bell peppers with quinoa and black beans
Ingrediets
- 4 bell peppers (any colour)
- 1 cup cooked quinoa
- 1 cup black beans, rinsed and drained
- 1/2 cup corn kernels
- 1/2 cup diced tomatoes
- 1/4 cup diced red onion
- 1/4 cup chopped fresh cilantro
- 1 teaspoon cumin
- 1/2 teaspoon chili powder
- 1/2 teaspoon garlic powder
- 1/4 teaspoon salt
- 1/4 teaspoon black pepper
- 1/2 cup shredded cheddar cheese (optional)
- Lime wedges, for serving
Instructions:
- Preheat your oven to 375°F (190°C).
- Cut off the tops of the bell peppers and remove the seeds and membranes. Set the peppers aside.
- In a large bowl, combine the cooked quinoa, black beans, corn kernels, diced tomatoes, red onion, cilantro, cumin, chili powder, garlic powder, salt, and black pepper. Mix well to ensure all the ingredients are evenly incorporated.
- Stuff each bell pepper with the quinoa and black bean mixture, pressing it down gently to fill the peppers completely. If desired, sprinkle shredded cheddar cheese on top of each stuffed pepper.
- Place the stuffed bell peppers in a baking dish, standing upright. Cover the dish with foil.
- Bake in the preheated oven for 25-30 minutes or until the peppers are tender and the filling is heated through.
- Remove the foil and continue baking for an additional 5 minutes, or until the cheese is melted and bubbly (if using).
- Once cooked, remove the stuffed bell peppers from the oven and let them cool slightly before serving.
- Serve the stuffed bell peppers with a squeeze of fresh lime juice on top for added flavours.
These stuffed bell peppers with quinoa and black beans make a delicious and nutritious meal prep option.
The combination of protein-rich quinoa, fibre-packed black beans, and a variety of colourful vegetables creates a satisfying and flavourful filling.
The spices add a hint of warmth and depth to the dish. Feel free to customize the recipe by adding your favourite vegetables or adjusting the seasoning to suit your taste preferences.
By prepping these stuffed bell peppers in advance, you can have a wholesome and convenient meal ready to enjoy throughout the week.
Grilled tofu with stir-fried vegetables
Ingrediets
- 1 block of firm tofu, drained and pressed
- 2 tablespoons soy sauce
- 2 tablespoons sesame oil
- 2 cloves garlic, minced
- 1 teaspoon grated ginger
- 1 tablespoon rice vinegar
- 1 tablespoon honey or maple syrup (optional for sweetness)
- 1 tablespoon cornstarch
- 1 tablespoon water
- 2 tablespoons vegetable oil
- 1 small onion, thinly sliced
- 2 bell peppers, thinly sliced
- 1 zucchini, thinly sliced
- 1 carrot, thinly sliced
- 1 cup broccoli florets
- Salt and pepper, to taste
- Sesame seeds, for garnish
- Chopped green onions, for garnish
Instructions:
- Prepare the tofu by slicing it into rectangular pieces. In a shallow dish, whisk together soy sauce, sesame oil, minced garlic, grated ginger, rice vinegar, and honey (if using). Place the tofu slices in the marinade, making sure they are well coated. Allow the tofu to marinate for at least 15-20 minutes.
- In a small bowl, mix cornstarch and water to create a slurry. Set aside.
- Heat vegetable oil in a large skillet or wok over medium-high heat. Add the sliced onion, bell peppers, zucchini, carrot, and broccoli florets. Stir-fry the vegetables for 5-7 minutes or until they are tender-crisp. Season with salt and pepper to taste.
- While the vegetables are cooking, preheat a grill pan or grill over medium heat. Place the marinated tofu slices on the grill and cook for 3-4 minutes on each side, or until grill marks appear and the tofu is heated through.
- Once the vegetables are cooked, push them to one side of the skillet or wok. Pour the cornstarch slurry into the other side of the pan, stirring quickly to thicken the sauce. Once the sauce thickens, toss the vegetables in the sauce until they are evenly coated.
- To serve, place the grilled tofu on a plate and spoon the stir-fried vegetables on top. Garnish with sesame seeds and chopped green onions.
This grilled tofu with stir-fried vegetables is a nutritious and satisfying meal prep option. Tofu provides a good source of plant-based protein, while the colourful assortment of vegetables adds vitamins, minerals, and fibre to the dish.
The marinade infuses the tofu with savoury flavours, and the stir-frying technique preserves the crunch and freshness of the vegetables. You can adjust the seasoning and spice level according to your preference by adding soy sauce, chili flakes, or other seasonings.
By prepping this dish in advance, you can enjoy a wholesome and delicious meal throughout the week.
Shrimp stir-fry with brown rice
Ingrediets
- 1 pound shrimp, peeled and deveined
- 2 tablespoons soy sauce
- 1 tablespoon oyster sauce
- 1 tablespoon sesame oil
- 1 tablespoon cornstarch
- 2 tablespoons vegetable oil
- 3 cloves garlic, minced
- 1 tablespoon grated ginger
- 1 bell pepper, thinly sliced
- 1 carrot, thinly sliced
- 1 cup snap peas
- 1 cup broccoli florets
- 2 green onions, chopped
- 3 cups cooked brown rice
- Salt and pepper, to taste
- Sesame seeds, for garnish
Instructions:
- In a bowl, combine the soy sauce, oyster sauce, sesame oil, and cornstarch. Add the shrimp to the marinade and toss to coat. Allow the shrimp to marinate for about 15 minutes.
- Heat vegetable oil in a large skillet or wok over medium-high heat. Add the minced garlic and grated ginger, and sauté for about 1 minute until fragrant.
- Add the marinated shrimp to the skillet and stir-fry for 2-3 minutes until they turn pink and opaque. Remove the shrimp from the skillet and set aside.
- In the same skillet, add the sliced bell pepper, carrot, snap peas, and broccoli florets. Stir-fry for 4-5 minutes until the vegetables are crisp-tender.
- Return the cooked shrimp to the skillet with the vegetables. Stir in the chopped green onions and season with salt and pepper to taste. Cook for an additional 1-2 minutes to allow the flavours to meld.
- Serve the shrimp stir-fry over cooked brown rice. Garnish with sesame seeds for added texture and flavour.
This shrimp stir-fry with brown rice is a nutritious and delicious meal prep option. Shrimp is a low-calorie protein source that is rich in omega-3 fatty acids and various minerals.
The stir-fried vegetables add vibrant colours, textures, and a variety of vitamins and antioxidants to the dish. Brown rice provides fibre and complex carbohydrates, making it a healthier alternative to white rice.
The marinade enhances the flavours of the shrimp and creates a savoury sauce that coats the vegetables. By prepping this dish in advance, you can enjoy a balanced and flavourful meal throughout the week, packed with protein, vegetables, and whole grains.
Spinach and feta stuffed chicken breast
Ingrediets
- 4 boneless, skinless chicken breasts
- 2 cups fresh spinach leaves
- 1/2 cup crumbled feta cheese
- 2 cloves garlic, minced
- 1 teaspoon dried oregano
- 1/2 teaspoon salt
- 1/4 teaspoon black pepper
- 1 tablespoon olive oil
Instructions:
- Preheat the oven to 400°F (200°C).
- Butterfly each chicken breast by making a horizontal cut through the thickest part of the breast, without cutting all the way through. Open up the chicken breast like a book and flatten it slightly using a meat mallet or the back of a heavy pan.
- In a mixing bowl, combine the spinach, feta cheese, minced garlic, dried oregano, salt, and black pepper. Stir well to combine.
- Place about 1/4 cup of the spinach and feta mixture onto one side of each butterflied chicken breast. Fold the other side of the chicken breast over the filling, pressing gently to seal it.
- Heat olive oil in an oven-safe skillet over medium-high heat. Add the stuffed chicken breasts to the skillet and cook for 2-3 minutes on each side until lightly browned.
- Transfer the skillet to the preheated oven and bake for about 20-25 minutes, or until the chicken is cooked through and reaches an internal temperature of 165°F (74°C).
- Remove the skillet from the oven and let the chicken rest for a few minutes before serving. This will help the juices redistribute for a tender and juicy chicken breast.
- Slice the stuffed chicken breasts and serve them as a main course with a side of steamed vegetables or a fresh salad.
This spinach and feta stuffed chicken breast recipe offers a delicious and nutritious meal option for your meal prep.
The chicken breast provides lean protein, while the spinach adds vitamins, minerals, and fibre. Feta cheese adds a tangy and creamy element to the filling, enhancing the overall flavours.
The garlic and oregano bring a delightful Mediterranean flair to the dish. By prepping this recipe ahead of time, you can have a protein-packed meal ready to go for busy weekdays.
Enjoy the combination of flavours and textures while nourishing your body with a wholesome and satisfying meal.
Veggie-packed omelette muffins
Ingrediets
- 6 large eggs
- 1/4 cup milk (or non-dairy milk)
- 1/2 cup chopped bell peppers (any colour)
- 1/2 cup chopped spinach
- 1/4 cup diced tomatoes
- 1/4 cup diced onions
- 1/4 cup shredded cheddar cheese (optional)
- Salt and pepper, to taste
- Cooking spray or olive oil, for greasing
Instructions:
- Preheat your oven to 350°F (175°C). Grease a muffin tin with cooking spray or olive oil.
- In a large mixing bowl, whisk together the eggs and milk until well combined. Season with salt and pepper to taste.
- Add the chopped bell peppers, spinach, tomatoes, onions, and shredded cheddar cheese (if using) to the egg mixture. Stir well to evenly distribute the veggies and cheese.
- Pour the mixture into the prepared muffin tin, filling each cup about 2/3 full.
- Bake in the preheated oven for 15-20 minutes or until the omelette muffins are set and slightly golden on top. You can check for doneness by inserting a toothpick into the centre of a muffin – if it comes out clean, they’re ready.
- Remove the muffin tin from the oven and let the omelette muffins cool for a few minutes. Use a butter knife to gently loosen the edges, then transfer the muffins to a wire rack to cool completely.
- Once the omelette muffins are completely cooled, you can store them in an airtight container in the refrigerator for up to 4 days. They can be enjoyed cold or reheated in the microwave for a quick and convenient breakfast or snack.
These veggie-packed omelette muffins are a nutritious and versatile meal prep option. Packed with colourful bell peppers, spinach, tomatoes, and onions, they provide a variety of vitamins, minerals, and antioxidants.
The addition of cheddar cheese adds a delicious creamy texture and flavour, but feel free to omit it or use a dairy-free cheese alternative if desired. These muffins are not only a great way to incorporate more veggies into your diet but also a convenient grab-and-go option for busy mornings.
Make a batch ahead of time, store them in the refrigerator, and enjoy a protein-rich and satisfying breakfast or snack throughout the week.
Baked cod with roasted sweet potatoes
Ingrediets
- 4 cod fillets
- 2 large sweet potatoes, peeled and cubed
- 2 tablespoons olive oil
- 1 teaspoon paprika
- 1/2 teaspoon garlic powder
- 1/2 teaspoon dried thyme
- Salt and pepper, to taste
- Fresh lemon wedges, for serving
- Fresh parsley, for garnish (optional)
Instructions:
- Preheat your oven to 400°F (200°C). Line a baking sheet with parchment paper.
- Place the cubed sweet potatoes on the prepared baking sheet. Drizzle with 1 tablespoon of olive oil and sprinkle with paprika, garlic powder, dried thyme, salt, and pepper. Toss the sweet potatoes until they are evenly coated with the seasonings.
- Bake the sweet potatoes in the preheated oven for 20-25 minutes, or until they are tender and lightly browned. Stir them once or twice during the cooking process for even browning.
- While the sweet potatoes are roasting, prepare the cod fillets. Pat them dry with paper towels to remove any excess moisture.
- Season the cod fillets with salt, pepper, and a drizzle of olive oil. Place the fillets on a separate baking sheet lined with parchment paper.
- Transfer the baking sheet with the cod fillets to the oven and bake for 12-15 minutes, or until the fish is opaque and flakes easily with a fork.
- Once the sweet potatoes and cod are cooked, remove them from the oven. Serve the baked cod fillets alongside the roasted sweet potatoes. Squeeze fresh lemon juice over the fish and garnish with fresh parsley, if desired.
This baked cod with roasted sweet potatoes recipe is a delicious and nutritious meal that is easy to prepare. The cod fillets are seasoned simply with salt, pepper, and olive oil, allowing their delicate flavour to shine through.
Paired with the sweet and caramelized roasted sweet potatoes, this dish offers a perfect balance of flavours. Cod is a lean source of protein and is rich in omega-3 fatty acids, which are beneficial for heart health.
Sweet potatoes provide a dose of fibre, vitamins, and antioxidants. This dish is not only satisfying but also a great option for those looking for a healthy and flavourful meal.
Enjoy it as a main course for lunch or dinner, and savour the delightful combination of tender baked cod and sweet, roasted sweet potatoes.
Teriyaki chicken with steamed Bok choy
Ingrediets
- 4 boneless, skinless chicken breasts
- 1/2 cup teriyaki sauce
- 2 tablespoons soy sauce
- 2 tablespoons honey
- 2 cloves garlic, minced
- 1 teaspoon grated ginger
- 1 tablespoon vegetable oil
- 4 heads of Bok choy, washed and trimmed
- Sesame seeds, for garnish (optional)
- Sliced green onions, for garnish (optional)
Instructions:
- In a bowl, whisk together the teriyaki sauce, soy sauce, honey, minced garlic, and grated ginger. Place the chicken breasts in a shallow dish or resealable plastic bag and pour the teriyaki marinade over them. Ensure that the chicken is well coated. Allow the chicken to marinate in the refrigerator for at least 30 minutes, or overnight for more flavours.
- Heat the vegetable oil in a large skillet over medium-high heat. Remove the chicken from the marinade, reserving the marinade for later use. Place the chicken in the skillet and cook for 6-8 minutes on each side, or until the chicken is cooked through and nicely browned. Remove the chicken from the skillet and set it aside to rest.
- While the chicken is resting, pour the reserved marinade into the skillet. Bring it to a boil over medium heat, then reduce the heat and simmer for 5 minutes to thicken the sauce slightly.
- In the meantime, prepare the Bok choy. Place a steamer basket in a pot filled with a few inches of water. Bring the water to a boil. Add the Bok choy to the steamer basket, cover, and steam for 4-5 minutes, or until the Bok choy is tender-crisp.
- Slice the cooked chicken into strips or bite-sized pieces. Serve the teriyaki chicken alongside the steamed Bok choy. Drizzle the teriyaki sauce over the chicken and Bok choy. Garnish with sesame seeds and sliced green onions, if desired.
This teriyaki chicken with steamed Bok choy recipe is a delightful combination of savoury and fresh flavours. The chicken is marinated in a flavourful teriyaki sauce, resulting in tender and juicy meat with a hint of sweetness.
Paired with the light and crisp steamed Bok choy, this dish offers a satisfying and nutritious meal option. Bok choy is low in calories and high in vitamins A, C, and K, as well as calcium and fibre.
The teriyaki sauce adds depth and richness to the dish, balancing the flavours of the chicken and Bok choy. Enjoy this delicious meal as a main course for lunch or dinner, and savour the delicious blend of teriyaki chicken and steamed Bok choy.
Chickpea and vegetable curry
Ingrediets
- 1 tablespoon vegetable oil
- 1 onion, diced
- 3 cloves garlic, minced
- 1 tablespoon grated ginger
- 2 tablespoons curry powder
- 1 teaspoon ground cumin
- 1/2 teaspoon ground turmeric
- 1/2 teaspoon paprika
- 1/4 teaspoon cayenne pepper (optional, for heat)
- 1 can (14 ounces) diced tomatoes
- 1 can (14 ounces) coconut milk
- 2 cups cooked chickpeas
- 2 cups mixed vegetables (such as carrots, bell peppers, cauliflower, and peas)
- Salt and pepper to taste
- Fresh cilantro, for garnish
- Cooked rice or naan bread, for serving
Instructions:
- Heat the vegetable oil in a large skillet or pot over medium heat. Add the diced onion and sauté until it becomes translucent, about 5 minutes. Add the minced garlic and grated ginger, and cook for another 1-2 minutes until fragrant.
- In a small bowl, combine the curry powder, ground cumin, ground turmeric, paprika, and cayenne pepper (if using). Stir the spice mixture into the skillet and cook for 1 minute, allowing the spices to release their flavours.
- Add the diced tomatoes (with their juices) and coconut milk to the skillet. Stir well to combine. Bring the mixture to a simmer and let it cook for about 5 minutes to allow the flavours to meld together.
- Add the cooked chickpeas and mixed vegetables to the skillet. Stir to coat them evenly with the curry sauce. Cover the skillet and let it simmer for 15-20 minutes, or until the vegetables are tender.
- Taste the curry and season with salt and pepper as desired. Adjust the spice level by adding more cayenne pepper or curry powder if desired.
- Serve the chickpea and vegetable curry over cooked rice or with naan bread. Garnish with fresh cilantro for added freshness and flavour.
This chickpea and vegetable curry is a delicious and satisfying vegetarian dish packed with protein, fibre, and an array of colourful vegetables.
The combination of spices creates a flavourful and aromatic curry sauce that coats the tender chickpeas and mixed vegetables.
Chickpeas are a great source of plant-based protein, while the mixed vegetables provide essential vitamins and minerals.
Beef and broccoli stir-fry with quinoa
Ingrediets
- 1 pound beef sirloin or flank steak, thinly sliced
- 3 tablespoons soy sauce
- 2 tablespoons oyster sauce
- 2 tablespoons hoisin sauce
- 1 tablespoon cornstarch
- 1 tablespoon vegetable oil
- 3 cloves garlic, minced
- 1 tablespoon grated ginger
- 2 cups broccoli florets
- 1 red bell pepper, thinly sliced
- 1 cup sliced mushrooms
- 1/2 cup beef or vegetable broth
- 2 cups cooked quinoa
- Salt and pepper, to taste
- Sesame seeds, for garnish (optional)
- Green onions, chopped, for garnish (optional)
Instructions:
- In a bowl, combine the soy sauce, oyster sauce, hoisin sauce, and cornstarch. Add the sliced beef to the bowl and toss to coat. Let it marinate for about 10 minutes.
- Heat the vegetable oil in a large skillet or wok over medium-high heat. Add the minced garlic and grated ginger and sauté for about 1 minute until fragrant.
- Add the marinated beef to the skillet and stir-fry for 3-4 minutes until browned and cooked to your desired level of doneness. Remove the beef from the skillet and set it aside.
- In the same skillet, add the broccoli florets, sliced bell pepper, and mushrooms. Stir-fry for about 3-4 minutes until the vegetables are crisp-tender.
- In a small bowl, whisk together the beef or vegetable broth with any remaining marinade from the beef.
- Pour the broth mixture into the skillet with the vegetables. Cook for an additional 2-3 minutes until the sauce thickens slightly.
- Return the cooked beef to the skillet and toss everything together to coat the beef and vegetables with the sauce. Season with salt and pepper to taste.
- Serve the beef and broccoli stir-fry over cooked quinoa. Garnish with sesame seeds and chopped green onions, if desired, for added flavours and visual appeal.
This beef and broccoli stir-fry with quinoa is a delicious and nutritious meal that combines tender beef, vibrant vegetables, and protein-packed quinoa.
The beef is marinated in a flavourful sauce, resulting in juicy and Savory bites. The combination of soy sauce, oyster sauce, and hoisin sauce creates a rich and umami-packed stir-fry sauce.
Cauliflower fried rice with grilled shrimp
Ingrediets
- 1 pound shrimp, peeled and deveined
- 4 cups cauliflower rice (made from grated cauliflower)
- 1 cup mixed vegetables (such as carrots, peas, and corn)
- 3 cloves garlic, minced
- 2 tablespoons low-sodium soy sauce
- 1 tablespoon sesame oil
- 1 tablespoon vegetable oil
- 2 eggs, beaten
- Salt and pepper, to taste
- Green onions, chopped, for garnish (optional)
- Sesame seeds, for garnish (optional)
Instructions:
- Preheat a grill or grill pan over medium-high heat. Season the shrimp with salt and pepper. Grill the shrimp for 2-3 minutes on each side until cooked through and slightly charred. Remove from heat and set aside.
- In a large non-stick skillet or wok, heat the vegetable oil over medium heat. Add the minced garlic and sauté for about 1 minute until fragrant.
- Add the mixed vegetables to the skillet and stir-fry for 2-3 minutes until they start to soften. Push the vegetables to one side of the skillet.
- Pour the beaten eggs into the other side of the skillet and scramble them until they are fully cooked.
- Add the cauliflower rice to the skillet and stir-fry for 3-4 minutes until it is heated through and slightly tender.
- Drizzle the soy sauce and sesame oil over the cauliflower rice. Toss everything together until well combined. Cook for an additional 2-3 minutes to allow the flavours to meld.
- Add the grilled shrimp to the skillet and stir-fry for another minute to heat them through.
- Season with salt and pepper to taste. Garnish with chopped green onions and sesame seeds, if desired, for added flavour and presentation.
Cauliflower fried rice with grilled shrimp is a healthier twist on the classic fried rice dish. By substituting traditional rice with cauliflower rice, you reduce the carb content and increase the vegetable intake.
Cauliflower rice provides a lighter and lower-calorie base while still delivering a satisfying texture and flavour.
Quinoa and black bean stuffed sweet potatoes
Ingrediets
- 4 medium sweet potatoes
- 1 cup cooked quinoa
- 1 cup black beans, rinsed and drained
- 1/2 cup corn kernels
- 1/2 cup diced bell peppers (any colour)
- 1/4 cup diced red onion
- 2 tablespoons chopped fresh cilantro
- 1 tablespoon lime juice
- 1 teaspoon ground cumin
- 1/2 teaspoon chili powder
- Salt and pepper, to taste
- Optional toppings: avocado slices, Greek yogurt, salsa
Instructions:
- Preheat your oven to 400°F (200°C). Line a baking sheet with parchment paper.
- Wash the sweet potatoes and pat them dry. Pierce each sweet potato several times with a fork or knife to create small holes.
- Place the sweet potatoes on the prepared baking sheet and bake for about 45-60 minutes, or until they are tender and easily pierced with a fork. The baking time may vary depending on the size of the sweet potatoes.
- While the sweet potatoes are baking, prepare the filling. In a large bowl, combine the cooked quinoa, black beans, corn kernels, diced bell peppers, red onion, chopped cilantro, lime juice, ground cumin, chili powder, salt, and pepper. Mix well to combine all the ingredients.
- Once the sweet potatoes are cooked, remove them from the oven and let them cool slightly for a few minutes. Carefully slice each sweet potato lengthwise down the centre, but not all the way through. Gently open the sweet potatoes to create a pocket for the filling.
- Spoon the quinoa and black bean filling into each sweet potato pocket, dividing it evenly among them. Press down gently to fill the sweet potatoes.
- Return the stuffed sweet potatoes to the oven and bake for an additional 10-15 minutes until the filling is heated through.
- Remove from the oven and let them cool slightly. Serve the stuffed sweet potatoes with your choice of toppings, such as avocado slices, Greek yogurt, or salsa.
Quinoa and black bean stuffed sweet potatoes make for a hearty and nutritious meal. Sweet potatoes are rich in fibre, vitamins, and minerals, while quinoa and black beans provide plant-based protein and additional fibre.
The combination of flavours and textures from the corn, bell peppers, red onion, and cilantro adds freshness and vibrancy to the dish.
Grilled lemon herb chicken with roasted Brussels sprouts
Ingrediets
- 4 boneless, skinless chicken breasts
- 2 lemons
- 2 tablespoons olive oil
- 2 cloves garlic, minced
- 1 teaspoon dried oregano
- 1 teaspoon dried thyme
- Salt and pepper, to taste
- 1 pound Brussels sprouts, trimmed and halved
- 2 tablespoons balsamic vinegar
- 1 tablespoon honey
- Optional garnish: Fresh parsley, chopped
Instructions:
- Preheat your grill to medium-high heat.
- In a small bowl, zest and juice one lemon. Add the olive oil, minced garlic, dried oregano, dried thyme, salt, and pepper. Stir well to combine.
- Place the chicken breasts in a shallow dish or a resealable plastic bag. Pour the lemon herb marinade over the chicken, coating each breast evenly. Allow the chicken to marinate for at least 30 minutes or up to overnight in the refrigerator.
- While the chicken is marinating, preheat your oven to 425°F (220°C). Line a baking sheet with parchment paper.
- In a large bowl, combine the Brussels sprouts, balsamic vinegar, honey, salt, and pepper. Toss well to coat the Brussels sprouts evenly. Transfer the Brussels sprouts to the prepared baking sheet and spread them out in a single layer.
- Roast the Brussels sprouts in the preheated oven for about 20-25 minutes, or until they are tender and lightly browned, stirring once halfway through.
- While the Brussels sprouts are roasting, remove the chicken from the marinade and discard the remaining marinade.
- Place the marinated chicken breasts on the preheated grill. Grill for approximately 6-8 minutes per side, or until the chicken is cooked through and reaches an internal temperature of 165°F (74°C). Cooking time may vary depending on the thickness of the chicken breasts.
- Remove the grilled chicken from the heat and let it rest for a few minutes before slicing.
- To serve, place a grilled lemon herb chicken breast on each plate. Squeeze fresh lemon juice from the remaining lemon over the chicken. Serve with a generous portion of roasted Brussels sprouts. Garnish with fresh chopped parsley, if desired.
Grilled lemon herb chicken with roasted Brussels sprouts is a flavourful and nutritious meal option. The marinade adds a zesty and aromatic touch to the chicken, while the grilling process creates a delicious charred flavours.
The roasted Brussels sprouts, coated in balsamic vinegar and honey, offer a caramelized sweetness and a crispy texture.
Mexican-style quinoa with avocado and salsa
Ingrediets
- 1 cup quinoa
- 2 cups water
- 1 tablespoon olive oil
- 1 small onion, diced
- 2 cloves garlic, minced
- 1 bell pepper, diced
- 1 can (15 ounces) black beans, rinsed and drained
- 1 can (15 ounces) corn kernels, drained
- 1 teaspoon cumin
- 1 teaspoon chili powder
- Salt and pepper, to taste
- 1 ripe avocado, diced
- Fresh cilantro, chopped (for garnish)
- Salsa, for serving
Instructions:
- Rinse the quinoa under cold water to remove any bitterness. In a medium saucepan, combine the rinsed quinoa and water. Bring to a boil over high heat, then reduce the heat to low, cover, and simmer for about 15-20 minutes, or until the quinoa is cooked and the water is absorbed. Remove from heat and let it sit, covered, for 5 minutes. Fluff the quinoa with a fork.
- In a large skillet, heat olive oil over medium heat. Add the diced onion and minced garlic, and sauté for about 3-4 minutes, until the onion is translucent and fragrant.
- Add the diced bell pepper to the skillet and cook for an additional 2-3 minutes, until the bell pepper is slightly tender.
- Stir in the black beans and corn kernels, followed by the cooked quinoa. Mix well to combine.
- Season the mixture with cumin, chili powder, salt, and pepper. Adjust the seasonings to taste.
- Remove the skillet from heat and gently fold in the diced avocado. Be careful not to mash the avocado too much.
- Serve the Mexican-style quinoa warm, garnished with fresh cilantro. Pair it with your favourite salsa for added flavours and a touch of heat.
Mexican-style quinoa with avocado and salsa is a vibrant and nutritious dish that combines the flavours of Mexican cuisine with the health benefits of quinoa.
Quinoa serves as a protein-rich base, while the addition of black beans and corn adds fibre, vitamins, and minerals. The combination of spices like cumin and chili powder gives the dish a delicious and aromatic taste.
Baked falafel with cucumber tomato salad
Ingrediets
For the falafel:
- 1 cup dried chickpeas
- 1/2 onion, roughly chopped
- 3 cloves garlic
- 1/4 cup fresh parsley, chopped
- 1/4 cup fresh cilantro, chopped
- 2 tablespoons flour (all-purpose or chickpea flour)
- 1 teaspoon ground cumin
- 1 teaspoon ground coriander
- 1/2 teaspoon baking powder
- 1/2 teaspoon salt
- 1/4 teaspoon black pepper
- 2 tablespoons olive oil (for brushing)
For the cucumber tomato salad:
- 1 large cucumber, diced
- 2 tomatoes, diced
- 1/4 red onion, thinly sliced
- 2 tablespoons fresh lemon juice
- 2 tablespoons olive oil
- 1/4 cup fresh parsley, chopped
- Salt and pepper, to taste
Instructions:
For the falafel:
- Place the dried chickpeas in a bowl and cover with water. Let them soak overnight. Drain and rinse the chickpeas before using.
- In a food processor, add the soaked and drained chickpeas, onion, garlic, parsley, cilantro, flour, cumin, coriander, baking powder, salt, and black pepper. Pulse the mixture until well combined and slightly coarse. Do not overprocess; you want some texture to remain.
- Transfer the falafel mixture to a bowl and refrigerate for 1-2 hours to firm up the mixture.
- Preheat the oven to 375°F (190°C) and line a baking sheet with parchment paper.
- Using your hands, shape the falafel mixture into small patties or balls, about 1.5 inches in diameter.
- Place the falafel on the prepared baking sheet and lightly brush each side with olive oil.
- Bake for 20-25 minutes, flipping halfway through, until the falafel is golden brown and crispy.
For the cucumber tomato salad:
- In a mixing bowl, combine the diced cucumber, tomatoes, and red onion.
- In a separate small bowl, whisk together the lemon juice, olive oil, chopped parsley, salt, and pepper.
- Pour the dressing over the cucumber tomato mixture and toss to coat evenly.
- Let the salad sit for a few minutes to allow the Flavors to meld together.
To serve:
- Arrange the baked falafel on a plate and serve alongside the cucumber tomato salad.
- Optionally, you can serve the falafel with pita bread or as a filling in wraps.
Baked falafel with cucumber tomato salad is a flavourful and satisfying vegetarian dish that is packed with protein, fibre, and fresh ingredients.
The falafel, made from chickpeas and aromatic herbs, is baked instead of fried, making it a healthier alternative without compromising on taste and texture. The crunchy exterior and tender interior of the falafel create a delightful contrast.
Tips For Meal Prep Recipes.
Here are some amaing tips for prepping your meal:
1. Plan your meals:
The cornerstone of effective weight loss meal preparation lies in meticulous meal planning. Dedicate ample time to craft a well-rounded weekly meal plan that encompasses the crucial components of breakfast, lunch, dinner, and snacks.
During the planning phase, it is imperative to factor in your individual caloric requirements and strike a harmonious balance between macronutrients. This ensures that you are consuming an optimal proportion of protein, carbohydrates, and nourishing fats.
By proactively outlining your meals beforehand, you equip yourself with a lucid blueprint for your dietary selections throughout the week. This method not only fosters a sense of organization but also serves as a deterrent against impulsive and unhealthy food choices.
Investing effort into creating a comprehensive meal plan is a key strategy in achieving successful weight loss through meal prep. Embrace this practice and witness the positive impact it has on your journey towards a healthier lifestyle.
2. Choose whole, nutrient-dense foods:
When it comes to selecting ingredients for your meal prep, prioritize whole, nutrient-dense foods. Fresh fruits, vegetables, lean proteins, whole grains, and healthy fats should form the foundation of your meals.
These foods are not only low in calories but also rich in essential vitamins, minerals, and fibre. They’ll keep you feeling full and satisfied while providing a wide range of nutrients and antioxidants.
Get creative with your choices and incorporate a variety of colourful fruits and vegetables to ensure you’re getting a diverse range of beneficial compounds.
3. Batch cook:
Batch cooking is a fantastic strategy for efficient meal prep. Dedicate a specific day or time each week to prepare larger batches of meals and snacks.
Cook multiple servings of proteins, grains, and roasted vegetables, and store them in separate containers for easy meal assembly.
This way, you’ll have pre-portioned meals ready to grab and go throughout the week. Batch cooking saves time and ensures that you always have a healthy option on hand, even during busy days.
4. Invest in quality food containers:
Investing in quality food containers is a wise decision for successful meal prep. Opt for sturdy, BPA-free containers that are microwave-safe and leak-proof.
Dividing your meals into individual portions not only makes them easily accessible but also prevents overeating.
Consider using containers with compartments to keep different components of your meals separate, preserving their freshness and flavours.
5. Pre-cut and pre-wash ingredients:
Prepping ingredients in advance is a key time-saving strategy. Take the time to pre-cut and pre-wash vegetables, wash fruits, and marinate proteins.
By doing this, you’ll significantly reduce the time and effort required to put together your meals. During busy days, having prepped ingredients at your fingertips will allow you to quickly assemble your meals without sacrificing nutrition.
6. Spice it up:
Don’t fall into the trap of thinking that healthy eating must be bland. Spice up your meals with different herbs, spices, and low-calorie sauces.
These flavours enhancers can add depth and excitement to your dishes without adding excessive calories. Experiment with different flavours profiles to keep your taste buds engaged and prevent meal prep boredom.
7. Store and label properly:
Lastly, proper storage and labelling are crucial for maintaining the freshness of your prepped meals and avoiding food waste.
Refrigerate or freeze your meals based on their shelf life. Label containers with the name of the meal and the date it was prepared to ensure you consume them within the recommended timeframes.
A well-organized storage system will help you stay on top of your meal prep game and ensure that your meals remain safe to eat.
Conclusion
Meal prepping is a game-changer when it comes to achieving weight loss goals. By dedicating a few hours each week to plan and prepare your meals, you can save time, money, and make healthier choices.
Incorporate the 20 meal prep ideas mentioned in this article, customize them according to your dietary preferences, and enjoy the benefits of nutritious and convenient meals throughout your weight loss journey.
Check out our website for more content like this.
Hi, this is a comment.
To get started with moderating, editing, and deleting comments, please visit the Comments screen in the dashboard.
Commenter avatars come from Gravatar.