Have you ever watched athletes effortlessly defy gravity, sculpting their bodies through mesmerizing movements that seem to blur the line between strength and art?
If so, you’ve caught a glimpse of the captivating world of Calisthenics Freestyle. It’s not just a workout; it’s a symphony of athleticism and creativity, where bodyweight becomes the brush and movement the canvas.
In this article, we’re diving headfirst into the realm of Calisthenics Freestyle, uncovering the secrets of mastering gravity-defying feats, crafting your routines, and finding inspiration that sets your fitness journey on fire.
Whether you’re a seasoned calisthenics enthusiast or just embarking on this exhilarating path, get ready to be inspired, informed, and ignited by the boundless possibilities of Calisthenics Freestyle.
Table of Contents
Benefits of Calisthenic Freestyle
Get ready to discover a symphony of benefits that are backed by research and fueled by your own determination.
1. Sculpted Strength and Endurance
Picture this: Every push, every pull, every twist and turn in Calisthenics Freestyle is a brushstroke that sculpts your body into a work of art.
Research has shown that calisthenics, including freestyle variations, can significantly improve muscular strength and endurance over time(*).
Whether it’s mastering the One-Arm Push-Ups or conquering Back Lever Rows, every move contributes to your ever-evolving masterpiece of strength.
2. Functional Fitness at Its Best
Calisthenics Freestyle doesn’t just make you look strong; it makes you functionally strong.
Research suggests that calisthenics exercises, by utilizing multiple muscle groups in a coordinated manner, enhance overall functional fitness and movement efficiency(*).
From lifting objects in everyday life to improving your posture, these movements have a real-world impact.
3. Flexibility and Mobility
Imagine your body moving with the fluidity of a dancer as you execute each freestyle movement.
Calisthenics Freestyle fosters flexibility and mobility, as the controlled motions stretch and strengthen muscles simultaneously(*).
Studies indicate that incorporating dynamic movements like those found in calisthenics routines can enhance joint range of motion and overall flexibility(*).
4. Mind-Body Connection
Calisthenics Freestyle isn’t just about physical prowess; it’s about honing the connection between your mind and body.
Research shows that bodyweight exercises, such as those in calisthenics, have a positive impact on cognitive function and mental well-being(*).
As you focus on each movement, you’re engaging your brain and cultivating a stronger mind-body relationship.
5. Versatility and Creativity
Your workout routine becomes a canvas of limitless possibilities with Calisthenics Freestyle.
Every exercise is a stroke of creativity, and the flexibility to modify and adapt movements adds a touch of personal flair.
Research suggests that incorporating creative and novel exercises can enhance motivation and adherence to a fitness routine(*).
Your body becomes both the brush and the masterpiece.
6. Engaging Cardiovascular Workout
Calisthenics Freestyle isn’t just about muscle power; it’s about cardiovascular engagement too.
Research points out that circuit-style training, often seen in calisthenics routines, can provide effective cardiovascular benefits(*).
The high-intensity bursts and dynamic movements elevate your heart rate, boosting your cardio fitness.
Calisthenics Freestyle Exercises
1. Dragon Flag Flutter Kicks
Prepare for a spectacle that fuses core strength and dynamic motion – the mesmerizing Dragon Flag Flutter Kicks.
Envision yourself defying gravity, navigating through these advanced calisthenic maneuvers that ignite your core and unveil the awe-inspiring potential of your body.
Get ready to channel your inner hero and embark on the journey of mastering Dragon Flag Flutter Kicks.
It’s a path that demands control, engagement, and a touch of audacity.
Let’s dissect it into manageable steps that will have you conquering this challenge in no time:
Step 1: Establish Your Base
Recline on a level surface or bench, ensuring your head securely rests at the edge. Grasp the bench with your hands firmly gripping the edge behind your head. Your body should stretch fully, forming a straight line from head to toes.
Step 2: Ascend with Poise
Activate your core muscles and employ them to lift both legs and upper body off the ground. The goal: create a seamless line from head to toe, crafting a V-shape with your body.
Step 3: Embrace Graceful Flutters
This is where enchantment unfolds. While maintaining the impressive V-shape, commence fluttering your legs. Imagine your lower body as the wings of a butterfly, fluttering gracefully while your core remains taut.
Step 4: Dedicate to Form
Amidst leg flutters, sustain engagement in your core to uphold the straight line from head to toes. Eschew haste; prioritize controlled, deliberate kicks.
Step 5: Harmonize Breath and Balance
Inhale and exhale rhythmically as you maneuver. Establish a cadence that feels harmonious and balanced, marrying breath and motion in fluid synchronization.
Step 6: Graceful Return
Having executed your desired number of flutter kicks, gently lower both legs and upper body to the starting position with graceful precision.
2. Embark on the Gravity-Defying Journey: 360 Pull-Ups
Imagine the familiar pull-up taking an electrifying twist – literally. This is the move that captivates the gym, leaving onlookers agape.
Today, we plunge into the realm of 360 Pull-Ups, dissecting the steps to conquer this dynamic exercise that unites strength and finesse in a single, remarkable package.
Strap in, as we set your pull-up regimen on an exhilarating spin:
Step 1: Secure Your Grip and Stance
Initiate with an overhand grip on the pull-up bar, hands a tad wider than shoulder-width. Dangle, arms extended, activating both your core and back muscles.
Step 2: Ignite the Ascent
Ignite the pull-up, engaging lats and biceps. As your body ascends, concentrate on sweeping your elbows downward and backward.
Step 3: The Dance of Dynamic Spin
As you approach the apex of your pull, magic unfolds. At the pinnacle, a controlled spin commences, engaging core and oblique muscles. Envision yourself as a pencil pirouetting through the air.
Step 4: Completing the Revolution
With the spin ignited, sustain the pull-up while allowing your body to elegantly rotate around the bar. Your hands orchestrate the motion as a full 360-degree rotation is gracefully executed.
Step 5: Nail the Disembarkation
As the rotation concludes, you’re once more facing the bar. Descend gracefully, embracing control as you return to the outset.
3. Unlock Gravity-Defying Feats: Handstand Push-Up Walks
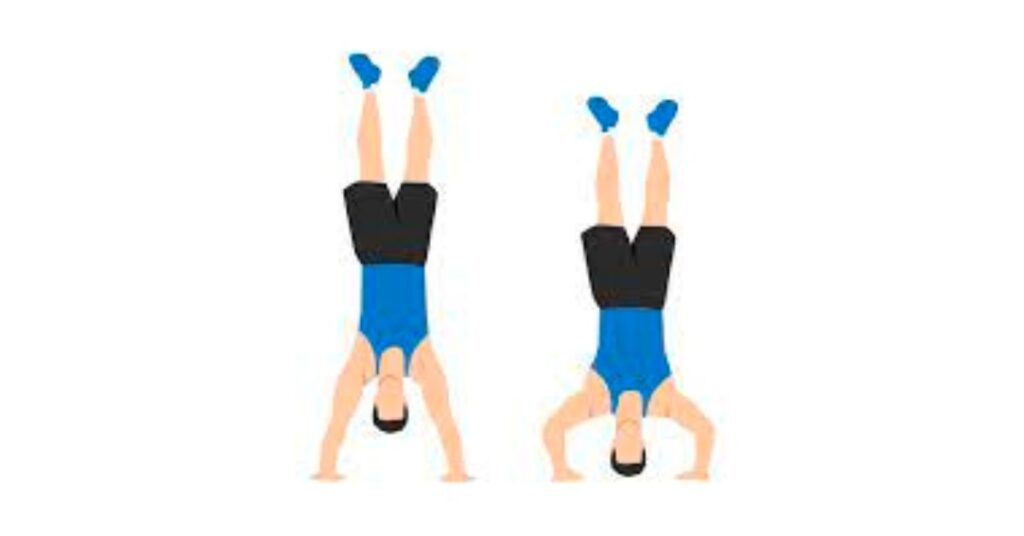
Picture yourself challenging gravity’s hold, surging through an exhilarating move that spotlights your shoulders, arms, and core with unprecedented intensity.
It’s more than an exercise; it’s a thrilling odyssey merging strength and equilibrium, every step a testament to your unyielding determination.
Are you primed to seize the plunge?
Let’s unravel it into steps that infuse real-world action, fast-tracking you to acrobatic prowess:
Step 1: Initiate Wall Work
Harness a wall for support. Face the wall, palms grounded at shoulder width, fingers pointing at the wall. Spring into a handstand, employing the wall to bolster your poise. Your body, a rigid plank, parallels the wall’s surface.
Step 2: Embark on a Controlled Descent
Flex your elbows, embarking on a deliberate handstand push-up. Aim for a gentle brush of your head against the ground amid your hands.
Step 3: Propelling the Push-Up
With your palms rooted, lift your body to the handstand posture. But here’s the twist: add extra vigor to push and “walk” your hands a few inches away from the wall.
Step 4: Balance and Traverse
Secure your equilibrium mid-handstand, then waltz your hands back toward the wall. This ceaseless dance of propulsion and movement rewards the exercise of its dynamic allure.
Step 5: Iterate and Elevate
Loop through the push-and-walk sequence for multiple repetitions, each time expanding your comfort zone by stepping farther from the wall.
As fortitude and confidence mount, you might even untether from the wall’s support, transitioning into the freestyle version.
4. Transcend Gravity: Conquer the Human Flag
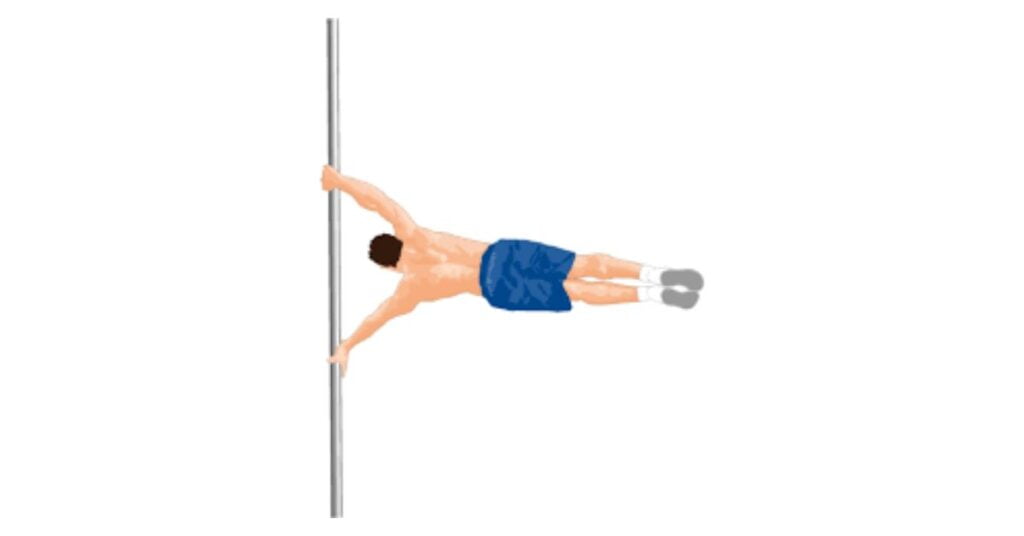
Conceive of defying gravity, your body transforming into a horizontal emblem suspended on a vertical pole – this is the allure of the Human Flag.
A spectacle of calisthenics freestyle, it unveils your strength and control, akin to a superhero’s portrayal.
Whether a neophyte or an aspirant of perfection, let’s delve into the art of mastering the Human Flag, step by step:
Step 1: Forge a Strong Foundation
Before embracing the Human Flag, construct a sturdy scaffold of upper body and core potency.
Hone pull-ups, chin-ups, and leg raises; these bedrock exercises mold the prerequisite muscle groups.
Step 2: Elevate the Vertical Pole
Discover a robust vertical pole, be it a steadfast street sign or a secure horizontal bar adhered to a steady framework.
Ascertain its weight-bearing capacity and verify its height for a horizontal body alignment.
Step 3: Grasp and Hand Placement
Initiate by gripping the pole with both hands, one atop the other. Your dominant arm should crown your position, weaker arm beneath.
The upper hand settles at shoulder level, while the lower clasps above your head.
Step 4: Foundation Formation
Plant yourself beside the pole, facing it. Elevate your mightier arm, lower arm poised below. The upper hand takes hold of the pole, while the lower hand grips above your head.
Step 5: Fortify Your Core
Activate your core for a resolute foundation. This stability is paramount in sustaining the horizontal configuration.
Step 6: Foot Placement and Propulsion
Raise your legs, morphing into a “V” contour. The premier foot strides in front of the pole, the other behind, ensuring balance.
Step 7: Ascend and Rotate
Stimulate the upward ascent, tugging with your dominant arm and propelling with your weaker arm. Simultaneously, flex your core, swaying your body. Amid ascent, your body pivots slightly.
Step 8: The Horizontal Hold
Persevere in your push, sustaining core and oblique tension. Your body, parallel to terra firma, back towards the pole, hips square.
Step 9: Breathe for Mastery
Sustain controlled breaths, fomenting coordinated movements and assuaging tension.
Step 10: Gradual Mastery
Conquering the Human Flag is a time-wrought endeavor. Commence with concise holds, progressively extending durations as proficiency augments.
5. Embark on a Singular Feat: Mastering One-Arm Push-Ups
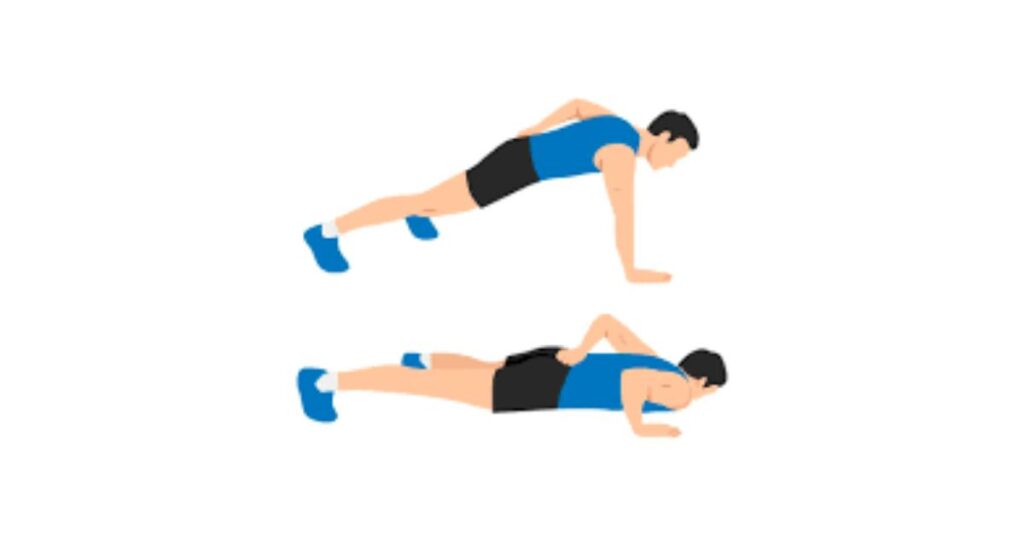
If the spectacle of one-arm push-ups has ever captivated your gaze, you’re in for a treat.
Beyond being a manifestation of physical prowess, it’s a testament to dedication and concentration.
Whether scaling this pinnacle for the first time or refining your form, here’s your comprehensive guide to mastering the captivating art of the One-Arm Push-Up:
Step 1: Foundational Might
Before embarking on the singular realm, bolster your regular push-up prowess. Proficiency in standard push-ups forges the bedrock of upper body might and stability.
Step 2: Imprint Your Grip
Commence with hands slightly wider than shoulder-width. The inactive hand rests near your hip or lower back, while the supporting hand supports your body.
Step 3: Staggered Stance
Stagger your stance, cultivating balance and stability. The foot on the working arm’s side remains a tad behind the other foot.
Step 4: Engage Core Vigorously
Strengthen your core, as though anticipating a slight punch. This robust core underpins the requisite stability for the one-arm push-up.
Step 5: Embrace the Descent
Lower your body gradually and with authority. Visualize your body’s descent as a gentle guidance, evoking participation from chest, shoulders, and triceps.
Step 6: The Elbow Tuck
During descent, draw your working arm’s elbow close to your body. This augments muscle engagement and sustains stability.
Step 7: Find the Optimal Depth
Strive to lower yourself until your chest hovers just above the ground. Discovering this optimal depth balances strength and form.
Step 8: Power Through the Push
Focalize on the upward thrust, enlisting your chest and triceps to elevate your body. Envision thrusting the floor away, optimizing effort.
Step 9: Align Your Form
Throughout the sequence, preserve a straight alignment. Avert rotational or sagging motions that undermine exercise integrity.
Step 10: Progress Gradually
Conquering the one-arm push-up entails patience and progression. Commence with incline or kneeling variations, and incrementally ascend to the full move as strength blossoms.
6. Master the Symphony: Muscle-Up Transitions
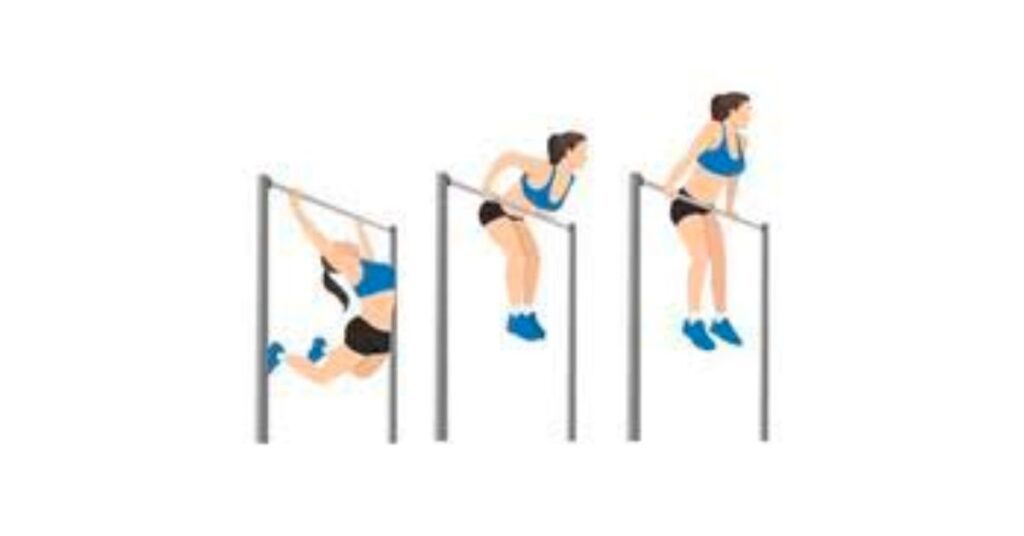
If the seamless ascent over a bar has ever captivated your gaze, you’ve been entranced by the magic of a muscle-up transition.
It’s not just a display of might; it’s a symphony of timing, coordination, and governance that spotlights your body’s extraordinary capacities.
Fear not, for we’re unraveling the mystery, outlining the precise steps to dominate the art of muscle-up transitions.
You don’t need to be an elite athlete; all you need is an inclination to stretch your limits and embrace the journey.
Let’s dive in with the steps to conquer this gravity-defying feat:
Step 1: Laying the Bedrock
Before soaring into new realms, ascertain a robust foundation in pull-ups and dips. These bedrock movements instill the upper body potency indispensable for muscle-up transitions.
Step 2: Grasp and Approach
Commence with an overhand grip on the bar, hands a smidgen beyond shoulder-width. Hang, arms fully extended, as your core engages, and a slight forward incline manifest.
Step 3: The Propulsive Pull
This is the inception of magic. Propel yourself upward, involving lats and biceps. As your body ascends, concentrate on tracing your elbows down and back.
Step 4: Transcending with Momentum
As you approach the zenith, this is where enchantment resides. At the pinnacle of your pull, kindle the transition by nudging your chest forward, altering your grip from pull-up to dip mode. This entails a wrist twist, positioning palms inward.
Step 5: The Dip
With hands in dip mode, persist in the upward journey, propelling yourself from the bar. The momentum derived from the pull and push propels you over the bar.
Step 6: Graceful Descent
Once past the bar’s apex, gradually descend into the dip posture. Engage your core, commanding control during the descent.
Step 7: Full Extension
Fulfil the muscle-up transition, elongating your arms completely, positioning your body firmly above the bar.
Step 8: Controlled Return
Reverse the sequence, descending with precision to the commencing posture. Control is pivotal, averts undue stress on joints.
7. Cultivate Aerial Artistry: Bar Spin Swings
Embark on a jubilant calisthenics venture, injecting a dash of acrobatic exhilaration with the electrifying Bar Spin Swings.
Imagine the sensation of soaring, suspended from a resolute bar, infusing your unique flair with genteel spins.
Here, freestyle calisthenics’ sprightly essence meets circus’ heart-pounding thrill.
If you’re poised to unleash your inner daredevil, heed these steps to embrace the artistry of Bar Spin Swings:
Step 1: Discover Your Arena
Unearth a steadfast horizontal bar, capable of sustaining your weight and choreography. A park’s pull-up bar or a tenacious calisthenics bar is apt for your aerial escapades.
Step 2: Warm-Up and Grasp Prep
Prior to lifting off, kindle warmth within your body. Swing your arms, shoulders, and hips, igniting a sense of limberness. Now, seize the bar with an overhand grip, hands mildly beyond shoulder-width.
Step 3: Inaugurate the Swing
Initiate with a pendulum-like sway. To generate momentum, execute a gentle hop or propel off the ground with your feet. Keep your legs aligned and cohesive, core taut to balance.
Step 4: Infuse a 180-Degree Whirl
While swaying forward, instigate a spin by imparting more force to one hand. As your form rotates, release one hand, extending the arm outward. Your body revolves around the bar, while the grip remains secure.
Step 5: Transference of Grip
At the 180-degree spin’s culmination, reclaim your grip using the relinquished hand. Now oriented in the opposite direction, your body maintains parallelism with the ground, akin to a pull-up stance.
Step 6: Round-Trip and Landing
Employ your legs’ momentum to propel you backward. As you retreat, integrate momentum to realize a 180-degree spin in the opposing direction. The culmination returns you to the initial posture, gazing at the bar.
Step 7: Gentle Landing
As momentum wanes, prime yourself for landing by slightly flexing knees. Your feet tenderly touch the earth, recuperating equilibrium.
8. Embark on Ethereal Mastery: Planche Progressions
Envision yourself defying gravity, suspended midair, your hands sole support for your body weight.
The Planche beckons – a spellbinding calisthenics feat necessitating robustness and a touch of enchantment.
If the odyssey of mastering this phenomenon beckons, steel yourself.
We’re unraveling Planche progressions, seasoned with candid encouragement, along this enthralling journey:
Step 1: Enkindle Fundamental Might
Before ascending ethereal heights, erect a solid foundation. Conquer push-ups, dips, and core calisthenics like planks. This preparatory scaffolding primes muscles, cultivating indispensable Planche potency.
Step 2: Enrich Core Potency
Planche materializes via core muscles’ wizardry. Infuse hanging leg raises, hollow body holds, and L-sits into your regimen. These maneuvers cultivate core robustness and foster Planche’s vital equilibrium.
Step 3: Tuck into Planche Progression
Initiate with tuck Planche progressions to discern weight distribution and equilibrium. Placing hands on the ground, fingers forwards, incline your torso while tucking knees to your chest. Seek that elusive equilibrium.
Step 4: Advanced Tuck Planche
As confidence swells, progressively elongate legs while sustaining tuck. This bridge between tuck Planche and full incarnation solidifies shoulder and wrist strength.
Step 5: Straddle Planche
Extend legs into a straddle stance while upholding body weight on hands. This progression intensifies shoulder and core stamina, allowing equilibrium exploration.
Step 6: Attain Full Planche
Eureka moment – the full Planche. Fuel your body with resolute determination, hourglass hours of practice. Your body shall hold parallel to terra firma. Hone your posture, core engagement, and dream of triumph.
9. Fathom Elevation: L-Sit to Handstand Transition
Have you ever dreamt of challenging gravity, transmuting a robust L-sit into a triumphant handstand seamlessly?
Engage in the feat of an L-sit to Handstand, a spectacle of might, balance, and finesse in calisthenics freestyle.
Not merely about transcending physical limits, but ascending off the ground, setting skies alight.
Unveil this progression, devoid of magic, yet enriched with commitment and courage:
Step 1: Prelude with L-sit
Master the L-sit’s essence. Seat yourself, legs extended, palms by hips. Propel upwards, core kindled, body aloft. Legs form an “L”, challenging triceps and core.
Step 2: Nurture Handstand Assurance
Befriend the handstand realm. Begin at the wall, hands shouldering-width apart. Elevate feet, envision a vertical handstand against the wall. This primes you for alignment and confidence.
Step 3: Bridge the Transition
Transition from L-sit to handstand’s a moment of magic. Commence in L-sit, hands beside hips. With vigorous core and arm power, raise hips, legs straight. This transfers weight from hands to shoulders.
While hips rise, execute a controlled kick, steering momentum wallward. Legs elevate, upper body follows, attaining handstand against the wall.
Step 4: Equilibrium and Poise
Once in handstand, sculpt equilibrium and command. Kindle core, fingertip engagement, and equilibrium discovery. L-sit to Handstand is a symphony, resonating strength and grace. Achieving equilibrium’s paramount.
Step 5: Artful Descent
Descending’s as vital as ascent. Lower legs with authority, retracing handstand path. Approach ground, recreate L-sit, precision paramount.
Step 6: Advance through Practice
Initiate wall-abetted transitions, amassing strength, kindling assurance. Advance sans support as prowess burgeons.
10. Back Lever Rows
Imagine yourself suspended in mid-air, effortlessly pulling your body weight while defying conventional limits.
It’s like becoming the protagonist of your very own action movie scene. If you’re looking to level up your calisthenics freestyle game, these Back Lever Rows are the perfect addition to your repertoire.
Let’s dive into the excitement with step-by-step guidance:
Mastering Back Lever Rows: A Gravity-Defying Feat
Step 1: Preparation and Equipment
Find a sturdy horizontal bar or gymnastics rings that can support your weight. Ensure the bar is positioned at a height that allows your feet to clear the ground.
Step 2: Warm-Up and Mobility
Before attempting any advanced move, warm up your body thoroughly. Focus on shoulder and wrist mobility to prepare for the demands of the exercise.
Step 3: Start with Tuck Back Lever
Begin by practicing the tuck back lever to build the foundational strength and body awareness required for the full movement. Hang from the bar and tuck your knees into your chest, keeping your elbows extended.
Step 4: Engage Your Core and Shoulders
As you progress to the Back Lever Rows, engage your core muscles and activate your shoulders. These are key for maintaining balance and control throughout exercise.
Step 5: Initiate the Row
From the tuck back lever position, start the rowing movement by retracting your shoulder blades and pulling your chest toward the bar. Imagine pulling your elbows down and back, just like in a standard rowing motion.
Step 6: Maintain Control
As you pull your body up, work on maintaining a horizontal position parallel to the ground. This is where the challenge lies – keeping your body in line while rowing requires excellent core and back strength.
Step 7: Lowering with Control
After completing the row, lower your body back to the starting tuck back lever position with control. Avoid sudden movements to prevent strain on your shoulders and wrists.
Step 8: Progress Gradually
Back Lever Rows are advanced calisthenics move, so progression is key. Gradually extend your legs to create a straight body position as you become more comfortable with the exercise.
Step 9: Mind Your Form
Form is crucial for both safety and effectiveness. Keep your body engaged, shoulders down, and wrists aligned with your forearms to prevent unnecessary stress.
Step 10: Stay Patient and Persistent
Back Lever Rows require practice and dedication. Be patient with yourself and celebrate every step of progress, no matter how small.
Creating Your Freestyle Calisthenics Training Routine
Step 1: Warm-Up and Limber Up
Just like a painter prepares their canvas, start your routine with dynamic warm-up exercises for calisthenics. Focus on shoulder mobility to prepare your upper body for the upcoming challenges.
Step 2: Back Lever Rows – The Gravity-Defying Thrill
Picture yourself defying gravity, hanging mid-air, and performing Back Lever Rows like an acrobatic superstar.
Begin with the foundational Tuck Back Lever, where you tuck your knees and pull your chest towards the bar.
As you progress, extend your legs for a full-body horizontal rowing experience that showcases your strength and control.
Step 3: Blend in Push-Pull Symphonies
Balance is key in freestyle calisthenics. Alternate between push and pull movements like the One-Arm Push-Ups and Dragon Flag Flutter Kicks.
These exercises create a harmonious flow, engaging various muscle groups and amplifying your overall strength.
Step 4: Core Mastery and Flexibility Finesse
Incorporate L-sit to Handstand transitions for a blend of core mastery and flexibility finesse.
This exercise not only challenges your midsection but also showcases your prowess in seamless movement.
Step 5: Circuit Training Choreography
Channel your inner choreographer by crafting a circuit that weaves these exercises together.
Go from Back Lever Rows to Dragon Flag Flutter Kicks, and then smoothly transition into L-sit to Handstand.
This dynamic circuit keeps your heart rate up and your muscles engaged.
Step 6: Cool Down and Celebrate
Just like an artist admires their finished work, end your routine with a soothing cool-down.
Focus on stretching your shoulders, back, and legs to promote flexibility and prevent any tightness.
Step 7: Nourish Your Body Canvas
Your workout isn’t complete without proper nourishment. Whip up a post-workout keto smoothie loaded with essential macros – protein for muscle repair, fats for energy, and carbs to refuel your body’s engine.
Step 8: Embrace Progression and Patience
Freestyle calisthenics is a journey, not a sprint. Celebrate each milestone – whether it’s holding a Back Lever longer or perfecting your One-Arm Push-Ups. Your canvas is always evolving, and your progress is a testament to your dedication.
Technique and Tips for Freestyle Calisthenics
Think of it as your personal guide to sculpting strength, while we sprinkle in some fitness magic. Ready? Here we go, in straightforward points:
- Build Your Foundation with Basics: Just like constructing a sturdy building, begin with the essentials. Nail your basic push-ups, pull-ups, and squats. These moves lay the groundwork for freestyle calisthenics and ensure your body’s ready for the next level.
- Balance the Push-Pull Technique: Calisthenics push-pull legs routine is your bread and butter. Alternate between exercises that engage pushing muscles (like push-ups and dips) and pulling muscles (like pull-ups and rows). This balance sparks all-around strength.
- Dive into Macro Mastery: Don’t just move; fuel your body wisely. Macros, short for macronutrients (proteins, carbs, and fats), play a crucial role. Prioritize lean proteins for muscle repair, complex carbs for sustained energy, and healthy fats for overall wellness.
- Blend in Keto Smoothies: If you’re a keto enthusiast, power up with keto smoothies. Packed with fats and proteins, these blends are perfect for post-workout recovery. Opt for almond milk, avocado, protein powder, and a handful of berries for a delicious kick.
- HIIT the Ground Running: High-Intensity Interval Training (HIIT) is a freestyle favorite. Incorporate short bursts of intense exercises (think burpees, mountain climbers) followed by brief rests. HIIT keeps your heart racing and metabolism revved up.
- Embrace Circuit Training: Circuit training is your secret weapon. Combine different exercises into a circuit, performing each back-to-back with minimal rest. It’s a fantastic way to touch calories, enhance endurance, and elevate your freestyle game.
Conclusion
And behold, emerges a captivating odyssey through the ever-shifting realm of Calisthenics Freestyle.
This expedition delves beyond mere exercise; it’s an odyssey of propelling frontiers, fostering ingenuity, and nurturing both physique and psyche.
As witnessed, the advantages transcend the physical plane – they undergo metamorphosis, bolstered by meticulous study, and propelled by your unwavering commitment.
From chiseled might to heightened utilitarian fitness, pliancy reaching new echelons, and an elevated communion of body and soul, Calisthenics Freestyle extends a comprehensive methodology towards flourishing.
Every motion resembles an individual brushstroke, meticulously embellishing a tapestry of tenacity and empowerment.
And never forget, this transcends mere workout regimentation; it’s a way of life harmonizing artistry with athleticism.
As you propel onwards, clasp the adversities, exult in the milestones, and persist in unveiling the boundless prospects that Calisthenics Freestyle bestows.
You embark on more than just a fitness sojourn; you craft your personal saga of fortitude, resolve, and an unyielding ardor to attain magnificence.
Your canvas stands primed – now, go, and etch your magnum opus.
2 thoughts on “10 Best Calisthenics Freestyle Moves to Elevate Your Fitness Journey”